The making of the soap is not particularly difficult, though because you use caustic soda (sodium hydroxide) you DO have to be careful and adhere to all the safety guidelines that go hand in hand with using a dangerous/caustic substance, like wearing safety goggles and a ventilation mask, enclosed shoes and protective clothing.
The more difficult part of soap making is formulating a balanced soap and producing that soap consistantly, batch after batch.
Every oil has its own properties and characteristics and therefore every oil also has its own SAP value, that is the amount of caustic soda needed to change it into soap. Picking a blend of oils with the characteristics you are after in the right amounts to make a balanced soap is a bit trickier.
You can get away with using other soap formula's that you find online but its always wise to run those through a soap calculator to make sure there were not any typo's in the formula's. A very easy to use soap calculator can be found here at Magestic Mountain Sage's website: www.thesage.com. I suggest you enter a few of the recipes they have on their site into their calculator to both check the recipe is correct and also there is a handy resizing button on their calculator so you can make each formula into the size you need it without having to work it all out yourself.
 |
| The liquids used to make this beer soap |
 |
| Pre weighed and frozen beer/ginger beer mixture |
 |
| weigh out the soft oils |
 |
| weigh out the hard oils, these need to be gently melted before you make soap |
I also like to prepare my oils phase earlier and I do this by again weighing all oils I will be using into my big saucepan or bucket and if needed melting them (palm oil is solid in winter and if you are going to use cocoa butter or shea butter that will need melting as well) and putting them aside till they are needed.
I do my soap this way because I then dont have to worry about the oils being too hot and having to cool them down before making soap.
 |
| Make sure you have everything ready to make soap before you start as once you start making soap you cant stop along the way! |
When I am ready to make my soap make sure I have everything I need to make the whole batch of soap out on the bench, like my moulds, my colourants, my scents and any utensils and things I will need to complete my soap.
 |
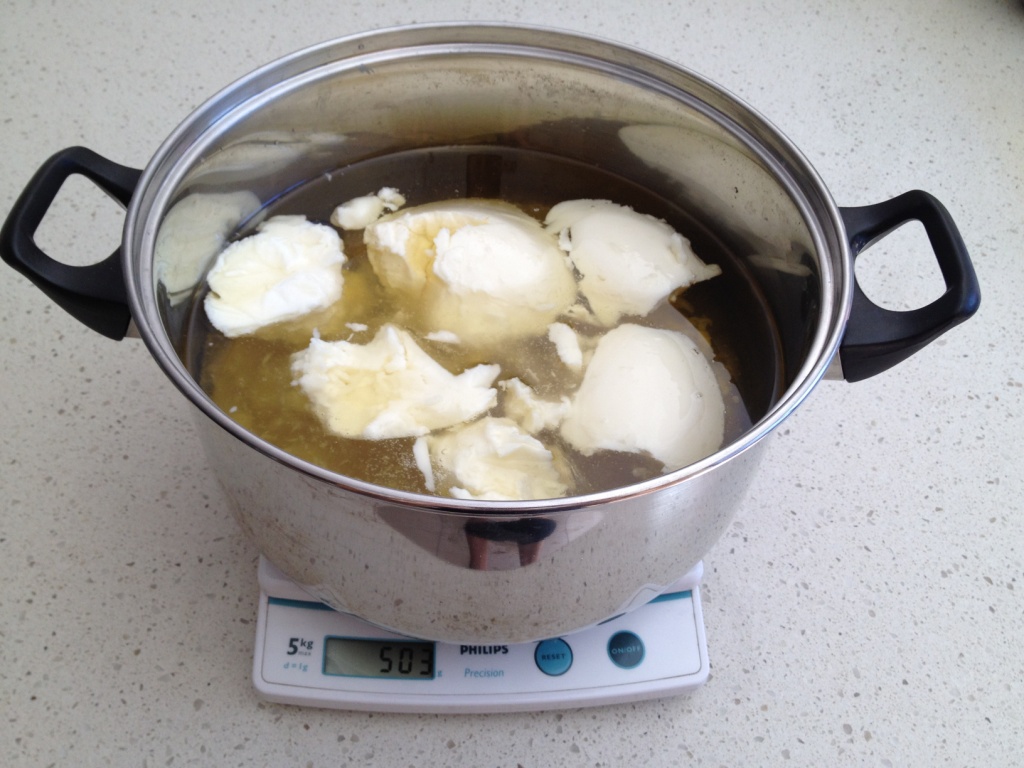
| weighing out my frozen beer to check the amount |
I then take my frozen beer/ginger beer mixture out of the freezer and I pop it into a stainless steel bowl. I then weigh out the amount of caustic soda I need to make my soap and immediately add it to the bowl on top of the frozen beer/ginger beer ice block and start stirring it around with my plastic spoon.
 |
| weigh out the caustic soda/sodium hydroxide/lye, being careful not to breathe any in |
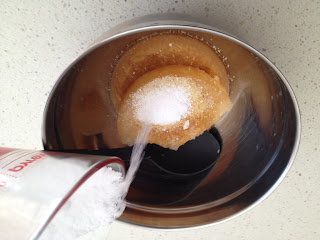

ALWAYS add the caustic to the liquid
 |
| Once the caustic is added, stir to start the heating up process |
 |
| melting frozen beer/lye slushy mixture, keep stirring |
 |
| Here you can easily see the immediate reaction of the lye mixture being added to the oils mixture |
 |
| Keep stirring while adding your lye mixture |
Then I imerse my stickblender into my oils/lye mixture and I stickblend my soap for only a few seconds, then I turn it off and stir the pot by hand using the stick blender as my 'spoon'.
 |
| Immerse the stickblender and tip to get any bubbles that might be trapped in it out before you start |
I do this for a few reasons, one is to help get rid of any bubbles
 |
| Then start mixing for only a few seconds at a time |
 |
| Stir regularly with the stick blender turned off to get rid of any bubbles in the mixture and also to check for trace happening |
I repeat this process until I reach the level of trace I am after, and for my beer soap, because I am not adding any additional scent or colour to it, I let it go onto a thicker trace than I usually would if I was adding those extra things.
 |
| soap is a quite a thickish 'trace' now |
 |
| Pour soap mix into your prepared moulds |
If I want flat topped soaps I will just leave the soap as it is in the mould.
 |
| for a flat topped soap simply leave at this stage till the next day |
If I want a more decorative soap top, I will wait for a while and then using a fork, spoon or other utensil of choice and I will texturise the top of the soap.
 |
| all poured into the moulds and ready to be put on the shelf until the next day when I will unmould the soap and slice it into bars for the next phase which is letting it cure for the next 4-6 weeks before it is ready to use |
Knowing the right time to do this is just practise. If its not thickened enough it will simply collapse back into itself and if you leave it set up too long it will be too hard for you to do as well and will just make a big mess!
Thank you for joining me on my journey to make my dads Christmas gift of Beer Soap I hope you enjoyed it as much as I did making it!
A little update: The soap is all cut into bars and has dried for a week now. It still smells STONGLY of beer and I am really hoping this fades off to the usual gentle ale scent I am used to with my beer soaps. The lather is wonderful with this soap as well due to the sugars in the drinks.
I have also shrink wrapped the bars to keep them dust free and keep the scent in the soap, it also helps to protect the soap for shipping. We will draw a winner of a few bars of this soap on my facebook page next week when we vote on the best name!
If anyone would like the formula for this beer soap to have a go at making it themselves, just leave a comment here on my blog and I will send it to them.
I will do another post on shrink wrapping and cutting soaps in a few weeks.
Take care and stay safe..
Amanda xox